Quick Answer
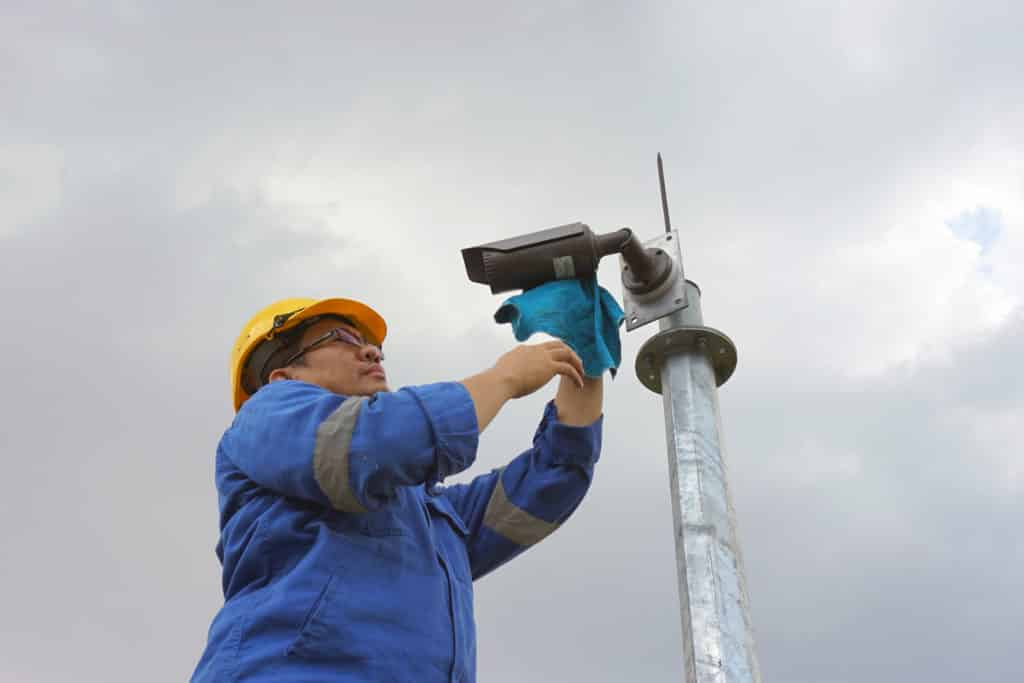
Cleaning your security camera lens regularly helps keep footage clear, analytics accurate, and your surveillance system working properly. Clean your security camera lens every 3–4 months to maintain clear footage and reliable surveillance performance. Use a soft brush or compressed air to remove loose debris, then gently wipe the lens with a lint-free microfiber cloth and approved lens cleaner. Avoid paper towels, harsh chemicals, and spraying liquids directly on the camera. While cleaning, inspect the housing, wiring, and camera angle to catch potential issues early.
Key Takeaways:
Keeping your security camera lenses clean is one of the simplest ways to protect your surveillance investment. Here’s what you need to know:
- Clean outdoor camera lenses every 3-4 months — more often in dusty, wet, or high-pollen environments.
- Use a soft brush, compressed air, and a lint-free microfiber cloth. Never use paper towels.
- Dirty lenses cause blurry footage, false motion alerts, and degraded night vision.
- Always power down hard-wired cameras before cleaning.
- While cleaning, inspect wiring, housing, and camera angles.
- For complex systems or hard-to-reach units, professional maintenance is worth considering.
We can’t think of a single piece of equipment that doesn’t require maintenance. That includes the commercial security system at your business. Typically, these units are fairly maintenance free. But there is one thing you should do periodically: Keep your security camera lens clean.
This blog will answer some of the most typical questions around how to clean your outdoor security camera lens.
Why Camera Maintenance Gets Overlooked (And Why It Shouldn’t)
Commercial security cameras are remarkably low-maintenance. That’s part of why lens cleaning gets skipped. But skipping it has consequences.
Dust, dirt, spider webs, and moisture accumulate over time. The degradation is gradual enough that you may not notice until the footage you actually need, whether you need to resolve an incident, track a thief, or settle a dispute, comes back blurry or useless.
This guide covers everything you need to know: why cleaning matters, how to do it correctly for different camera types, what tools to use… and when you should just call a professional.
Why is it Important to Clean Your Security Camera and Lens?

Keeping your camera lenses clean matters more than you might think. A few reasons to stay on top of it:
- Dirty lenses blur footage and can defeat detail-sensitive features like license plate recognition and facial identification
- Similarly, accumulated grime affects AI analytics running behind smart cameras, not just the image itself
- When footage needs to hold up in a legal or insurance context, image clarity is vital
Your cameras can fall victim to dust, dirt, cobwebs, and weather. Clearing the housing from any debris while carefully cleaning the surveillance camera lens will ensure a crystal-clear picture of your property at all times.
If your camera is outside, environmental conditions can smudge up the lens and obscure your vision. Dust is still probably the top lens smudger on the outside of your business. However, mud, leaves, bugs, and even raindrops can hamper observation. This could affect not only the picture but the analytics running behind your smart camera lens. While a few stains may not seem like a big deal, over time, it creates a cumulative effect until vision is obscured.
Wildlife and Pests Are a Bigger Threat Than You’d Expect
If you’ve ever seen a bird nesting on a CCTV camera, you understand the conditions that could affect this equipment. Rodents and birds can find cable insulation a good nesting material. Spiders frequently build webs right over the housing of the camera. We’ve even seen bees and wasps building nests off the camera housing on a pole or the side of a building. In the winter, the warmth of a camera can be an attractant to these creatures.
Making matters worse, even modern smart cameras are particularly vulnerable to these encroachments. For example, a zoom lens could end up focusing on the spiderweb over the lens instead of the external shot of your business. Light from the ring of the camera’s infrared illuminators can reflect visual information back to the software improperly if there’s an accumulation of dirt on the camera housing.
Incidentally, while being indoors does provide a measure of protection, especially against things like critters or rain, cleaning indoor security cameras is still important, and these cleaning tips still apply.
The benefit of cleaning your security camera lens is that when you need them the most, they’ll be there for you. You are placing a lot of faith in these tools. A good security system pays for itself every day. However, you as the owner must take steps to clean the surveillance camera lens on every unit regularly to keep them in tip-top shape.
So, let’s look at some of the main reasons why you should clean your camera and clean your camera’s lens, and then look at how to clean cameras and some pro tips to ensure longevity.
Top 5 Reasons to Clean Your Security Camera Lens
- Image Clarity: Dust, dirt, smudges, and fingerprints on your camera lens can significantly degrade the quality of your videos. Regular cleaning ensures your lens is free from obstructions, allowing it to capture sharp, clear, and vibrant images.
- Reduced Glare and Flare: Dirty or smudged lenses can cause glare, lens flares, and unwanted reflections in your videos, particularly when shooting in bright light. Cleaning your lens helps minimize these distractions and ensures your shots are visually appealing.
- Color Accuracy: A clean lens helps maintain accurate color representation in your videos. Dirty lenses can affect color balance and introduce unwanted color shifts, which can be challenging to correct during post-production.
- Enhanced Low-Light Performance: Clean lenses improve the camera’s low-light performance, allowing it to capture better quality footage in challenging lighting conditions. Dirty lenses may scatter light, reducing sensitivity and making it harder to record without noise or artifacts in low light.
- Longevity and Equipment Maintenance: Cleaning your security camera lens is essential for prolonging the lifespan of your video equipment. Over time, dust and debris on the lens can infiltrate the camera internals, potentially causing damage. Cleaning the security camera lens reduces the risk of contaminants affecting the camera’s sensitive components, including the sensor.
How Often Should I Clean My Surveillance Cameras?

You should clean your security camera lens on each unit at least every three or four months. Clean your CCTV cameras more often if they’re exposed to serious weather and you notice problems with the visuals you’re capturing.
Another tip to consider is to look at the conditions surrounding the CCTV camera as you’re cleaning it. Specifically, are there external conditions that could block your visual feed?
Does shrubbery need to be cut back from summer growth? Does the surrounding area need to be cleared of debris, or has the camera angle shifted over time? Your goal should be to determine a) If the lens is clean; and b) If it’s still producing the right visual you need. These checks take seconds and can prevent problems before they affect your footage.
Best Tools for Cleaning Security Camera Lenses
Using the right tools prevents damage and gets better results. Here’s what to have on hand:
- Soft-bristle brush: Removes loose debris and dust before wiping. Prevents scratching.
- Compressed air canister: Clears dust from housing and around the lens without contact. Hold the nozzle several inches away to avoid pushing debris into the camera.
- Microfiber cloth: The only safe option for wiping the lens surface itself. Lint-free and non-abrasive.
- Lens cleaning solution: A small amount on a microfiber cloth can remove smudges and greasy buildup. Do not apply directly to the camera.
- Isopropyl alcohol (90%+): An alternative to commercial lens cleaner for stubborn residue. Apply to the cloth, not the lens.
- Desiccant packs: Useful inside weatherproof housings to control moisture and condensation.
Avoid paper towels, rough cloths, or household glass cleaners. These can scratch the lens coating or introduce residue that attracts more dust.
How to Clean Security Cameras: Step By Step

The cleaning process varies slightly depending on camera type, but the same core steps apply to both. Always start with safety.
Step 1: Power Down (Hard-Wired Cameras)
Shut off the breaker to your hard-wired cameras before cleaning. If your cameras are wireless IP cameras, you can skip this step.
Step 2: Remove Loose Debris
Use your soft-bristle brush or a burst of compressed air to clear away loose dust, cobwebs, or insect debris from the camera housing. Keep the compressed air nozzle several inches from the lens.
Step 3: Wipe the Lens
Apply a small amount of lens cleaning solution to a microfiber cloth – be careful not to put the solution directly on the camera. Wipe the lens gently in a circular motion, starting at the center and working outward. Do not press hard. Excessive pressure can scratch the lens coating.
Step 4: Clean the Housing
Wipe down the camera body and housing. For outdoor box cameras that are muddy or greasy, a small amount of warm soapy water on the cloth is fine. If the housing opens, inspect the interior for insect eggs or moisture. If you find bees or wasps, contact an exterminator rather than attempting removal yourself.
Step 5: Inspect While You’re There
Before closing up and powering back on, check the following:
- Wiring: Is the insulation intact? Are there any frayed, cracked, or exposed sections?
- Camera angle: Is the camera still pointed at the right area?
- Housing: Any cracks or damage that could let moisture in?
- IR illuminators: Any burned-out LEDs that would affect night vision?
- Surrounding area: Does vegetation need to be trimmed back?
Step 6: Power Back On and Verify
Restore power and pull up the live feed. Check for clarity. If the image is still soft or foggy, repeat the lens cleaning process before assuming there’s a hardware issue.

Is There an Alternative to D-I-Y Surveillance Camera Cleaning?

DIY maintenance works well for routine lens cleaning, angle checks, and firmware updates. But there are tasks where professional service makes a meaningful difference, particularly for commercial systems with multiple cameras, hard-to-reach installations, or complex wiring.
Benefits of Professional Camera Maintenance
Especially for multi-camera commercial systems, periodic professional inspections help catch issues that aren’t obvious during a quick visual check, like loose connections, degraded housing seals, miscalibrated focus, or firmware vulnerabilities.
Professional Surveillance Camera Cleaning and Support
We know keeping your CCTV cameras clean and functioning can be a hassle. So, instead of Googling “How to clean my camera,” ask yourself, “do I want to handle all this security camera cleaning business myself?” Pro-Vigil provides expert maintenance services and ongoing support to ensure your surveillance equipment operates reliably when it matters most.
Pro-Vigil is a top provider of modern smart surveillance security infrastructures. We are proud to support our clients with the full package of security assessment and design, efficient installation, and long-term maintenance. Contact our team if you’re looking for a full-service solution to keep your business safer. We can help.
Final Takeaway
Regular maintenance helps keep your security cameras working effectively and delivering reliable performance. A simple cleaning routine can prevent blurry footage, reduce issues caused by dust and debris, and help your cameras deliver reliable protection when you need them most. By cleaning lenses properly, checking camera components, and scheduling professional maintenance when needed, you can extend the life of your surveillance system and maintain a clearer view of your property.
Security Camera Cleaning: FAQs